One of the primary goals of moving to the Modern Homepage was to break way from the widgets and into the block editor, so that it could be modified in almost any way you can imagine.
Please, whatever you do, do not be dissuaded. CREATE. Please CREATE.
Try on styles. Copy. Mimic. MAKE.
It's the best and fastest way to learn YOUR STYLE. Imitate away & don't be ashamed to do what it takes to learn.
Brooke Lark, Free 90-minute Food Photography Crash Course
We'll provide CSS snippets that can be embedded into the homepages CSS, if only being used on the one page.
While these styles are loosely based on the original theme styling, we've simply assigned them numbers because they're not married to that theme. You can use any style that best matches your brand, on any theme.
Jump to:
CSS
We do not offer support for manually customizing your site using CSS.
Use the "Homepage Styling" dropdown menu below.
Choosing a style
As of version 5.6.3, you can choose one of the styles from a dropdown menu in the block editor:

Style #1
Style #1 as seen on foodiepro.com: classic, clean, minimal with centered headers and light outlines

CSS
/* headings */
.entry-content h2 { margin: 57px 0 17px 0; padding-bottom: 17px; border-bottom: 1px solid #EEE; text-align: center; }
/* search box */
.wp-block-search { margin: 57px 0; padding: 0; background: #FFF; }
.wp-block-search button, .wp-block-search__label { display: none; visibility: hidden; }
.wp-block-search input,  .wp-block-search ::placeholder { color: #333; text-align: left;}
.wp-block-search input { border: 1px solid #CCC; padding: 17px; background:#fff url("images/search.svg") center right no-repeat; background-size:contain;
}
Style #2
Style #2 as seen on brunchpro.blog: strong, bold headings with full-width-background

CSS
/* headings */
.entry-content h2 { margin: 77px 0 47px; padding: 7px; background: #333; text-align: center; background: repeating-linear-gradient( -45deg, #333, #393939 10px, #3A3A3A 10px, #2F2F2F 20px ); border: 5px solid #333; color:#FFF; }
/* search block */
.wp-block-search { margin: 27px 0; padding: 17px; background: #EFEFEF; }
.wp-block-search button, .wp-block-search label { display: none; visibility: hidden; }
 .wp-block-search input, .wp-block-search ::placeholder { color: #333; text-align:center; }
Style #3
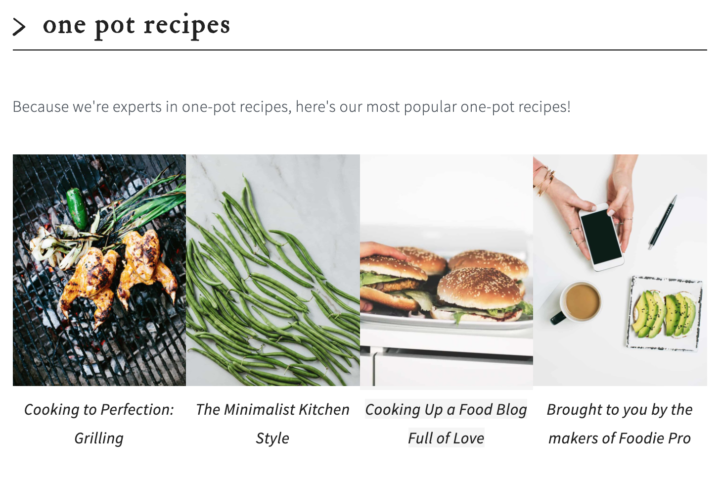
Style #3 as seen on cookdpro.com: relaxed, lowercase headings, underlined, with a decorative indent, and spacing removed between images

CSS
/* headings */
h2 { margin: 67px 0 47px; padding-bottom:7px; font-weight: bold; border-bottom: 1px solid #000; text-transform: lowercase; }
/* left arrow */
.entry-content h2:before { content: ">"; margin-right:17px; font-weight:bold; }
/* remove image spacing */
.fsri-list { margin-top: 37px !important; grid-gap: 17px 0px;; }
/* interactive image hover */
.listing-item img { border-bottom: 7px solid #FFF;}
.listing-item img:hover { border-bottom: 7px solid #DDD;}
/* search block */
.wp-block-search { margin: 47px 0; padding: 17px 0; background: #FFF; }
.wp-block-search input { color: #333; border-bottom: 1px solid #333; }
.wp-block-search button, .wp-block-search__label { display: none; visibility: hidden; }
.wp-block-search ::placeholder { color: #333; text-align: left; }
Cook'd Pro has a little more spacing around the heading than usual, and a full-width underline in both the entry-content and side. It also displays the headings as lowercase
This adds the little ">" to the left-side of each heading, but only for the entry-content.
The spacing between images is controlled by the CSS grid-gap property, applied to the parent element (not the actual images). We've also added more spacing than the other themes.
There's a little bar that appears under the images on hover. To do this, we add a white border to the bottom, which changes to grey on hover. This avoids having the layout reflowed.
Note: hover doesn't work on mobile, which typically makes up 80% of traffic to recipe sites.
Note: there was no easy way to add the ">" character before the search field, so you need to use the "Code Editor" (3 dots in the top right corner) and manually replace the search block with a different placeholder:
<!-- wp:search {"placeholder":"\u003e search for a recipe + hit enter"} /-->Style #4
Style #4 as seen on cravingspro.com: sharp, modern layout, with a trendy offset background heading element

CSS
/* headings */
.entry-content h2 { display: block; margin-top: 57px; font-weight: bold; text-transform: uppercase; position: relative; z-index: 1;}
.entry-content h2:after { background: #536ade99; position: absolute; content: ""; z-index: -1; height: 0.8em; margin-top: 0.8em; width: 100%; left: 0; }
Style #5
Style #5 as seen on seasonedpro.blog: tastefully accented images with unassuming headings

CSS
/* headings */
.content h2 { margin-top: 57px; font-weight: bold; text-transform:none; }
/* images */
.listing-item img, .about-the-author { border-top: 2px solid #ba4d2f; }
/* search */
.wp-block-search { margin:27px 0; padding: 17px; background: #f9eee5;}
.wp-block-search input { border: 2px solid #ba4d2f; }
.wp-block-search button, .wp-block-search__label { display: none; visibility: hidden; }
.wp-block-search ::placeholder { color: #333; text-align: center; }
Style #6
Style #6 as seen on cravingspro.com: playful headings and links, with soft-framed post listings

Note #1: this layout may work better with a one-third grid so that post titles have more breathing room.
Note #2: you'll need to import the Caveat Google Fonts, which we currently don't have a tutorial for.
General
Vertical images
Follow FSRI tutorial to change the default image size.
Link color
The title of the post will be colored to match your theme's link color, by default. You can over-ride this using:
.listing-item a { color: #333; }Headings
h1.entry-title { font-family: "Caveat", sans-serif; text-transform: none; font-size: 3em; padding-left:7px;  }
.entry-content h2 { font-family: "Caveat", sans-serif; text-transform: none; font-size: 3em; padding-left: 7px; display: block;  margin-top: 57px;  font-weight: bold;  position: relative; z-index:1;
}
.entry-content h2:after { background: #536ade99; position: absolute; content: ""; z-index: -1; height: 0.7em; margin-top: 0.85em; width: 100%; left: 0; }
Links
We only want the font applied to certain links, so we'll apply an accent-font class to those paragraphs or classes we want to stylize.
.accent-font { font-family: "Caveat", sans-serif; font-size: 1.5em; text-transform: none !important; }Side accent
h2 { position: relative; }
h2:after {
    height: 2em;
    display: block;
    width: 7px;
    background: #3a55d9;
    content: '';
	position: absolute;
	left: -27px;
	top: -0.4em;
}
Framed post listing
.fsri-list .listing-item { box-shadow: 2px 2px 5px #CCC; padding: 0 0 17px 0; border-radius: 2px; }
.fsri-list { grid-gap: 17px; }
.fsri-title { margin: 0 7px; }
Text overlay

We only recommend applying this to desktop (with the @media query) because of inconsistent results on mobile.
@media only screen and (max-width: 600px) {
.fsri-title { position: absolute; bottom: 30px; background-color: rgba(255, 255, 255, 0.8); width: 100%; padding: 7px; min-height:100px;}
}
Note: You may need to adjust the bottom attribute depending on your featured image orientation and column width. This does not display well in the block editor, so check the front end when modifying the styling.
You can use this hex to rgb converter to convert your hex color to the required RGB values.
Due to site-specific issues, we're unable to provide free support for this customization. If you'd like us to do it for you, reach out to us via a support ticket first, and we can do it with a 60-minute customization.
This will not work with display-star-ratings enabled.
Full width blocks
For the full width modern homepage only, a background can be expanded outside the normal content area by including this custom class and adding it to the container.
@media only screen and (min-width: 1024px) {
.custom-full-width { width: 100vw; position: relative; left: 50%; right: 50%; margin-left: -50vw; margin-right: -50vw; background: #EEE; padding: 17px 0; }
.custom-full-width .feast-recipe-index { width: 1140px; margin: 0 auto; }
.custom-full-width .listing-item { background: #FFF; padding: 17px; }
}
Then apply the custom-full-width class to your block's Advanced > Additional CSS class(es) field.
Additional styling may be required.
Full Width FSRI Block
Version 5.2.0 introduced a checkbox to enable full width displaying of the FSRI block.

This is now a simple checkbox in the block settings.
Display star ratings
Displaying star ratings was introduced in version 4.9.0 but currently is not recommended or supported because:
- it adds excessive DOM nodes to the page
- if your recipes are all 4.5 - 5 stars, it looks fake
- it currently only works with WPRM and Tasty Recipes, not Create
- it creates styling conflicts with other customizations on this page
- it really isn't useful to readers
Decorative accents for headings
Your heading tags should comply with the Modern Guidelines for page headings and shouldn't contain anything styling-related - this is the job of CSS.

To add decorative characters/accents to your headings, add this to your per-page CSS section:
.entry-content h2::before{ content:"\261E"; margin:0 17px; }
.entry-content h2::after { content:"\261C"; margin:0 17px; }
You can find symbols and punctuations to use in the content attribute in this HTML entities resource from Toptal. You want to use the CSS Code (slash followed by 4 characters) for the content attribute.
Manually editing (not supported)
If you want finer control over the styles being loaded, you can manually add the styles. We do not offer support or guidance for manually editing CSS.
Before making changes, you have to decide whether you want these changes to apply only to homepage, or to the entire site.
- If only styling the homepage, use the per-page CSS section in the post editor
- If changing the styling for the entire site, use the "Additional CSS" screen in the customizer
For the purposes of this post, we'll assume you're only styling the homepage.
Make sure that the CSS is inside a Custom HTML block and is wrapped with <style></style> tags.


Deborah says
I'm determined to figure out the Modern Homepage by myself, I am I am! So, I am trying to find a tutorial to change a widget title color for my subscriber sign up box at https://veganvigilanteblog.com. I went into customize and there is an option to change the title color, which I did, but that changes it for the whole site, not, even the little widget box. I did not want the title in the subscription widget box to be same color as the rest of the titles.
When I go to edit the Modern Homepage, it does not show the Genesis widget in any of the blocks so I am trying to figure out how to do it. I am working on a staging site so as not to disturb my live version. I also have the code snippets plugin, but could not find anything there that helped me figure this out. Can you tell me where to edit in the code snippets? or am I able to at all???
Skylar says
Hey Deborah!
This can be done using inspect element to identify the element, and then changing the color using CSS: https://feastdesignco.com/how-to/use-inspect-element-troubleshoot/
Han says
Hello! How do you change the colour of the text underline in the headings? I can't find any information about that in the documentation. I'm using Brunch Pro with Feast Plugin and Theme Style #4. Thanks!
dan says
Hey! Did you ever figure this out? We're trying to do the same thing. We figured out how to change it using CSS on individual pages, but want to change it on every page of the site so we don't have to put the CSS into every single page. Thanks!
Skylar says
Anything that you want to change site-wide goes into the Customizer -> Additional CSS screen.
Sarah says
Glad to find these styles, but I'm confused about where to make these edits. The video shows editing through the Pages tab, but I'm not sure how to get to Custom HTML from there. When I try to edit in the post editor on the Homepage, nothing changes (whether I apply a specific style number or enter the code on the per-page CSS). Thanks!