Brunch Pro has 4 available footer widget areas.
- Footer 1 is the 1/3-width far-left area
- Footer 2 is the 1/3-width middle area
- Footer 3 is the 1/3-width far-right area
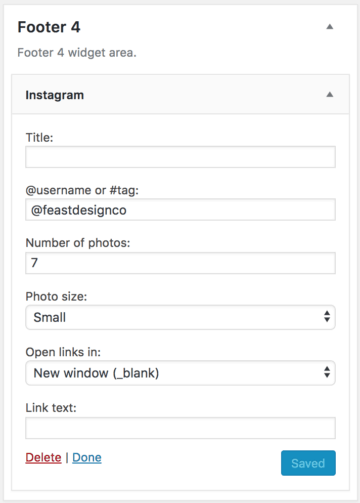
- Footer 4 is the full-width bottom area (banners, instagram widget)

Note: There needs to be a widget in Footer 1 in order for the other footer widgets to display.
If you don't want to use Footer 1 you can place a blank text widget there to get the other widget areas to display.

Footer 1
The Footer 1 area is configured for the Genesis User Profile widget. Please use the following settings to set up this widget area like the demo.
You can customize the text and then sign up for a Gravatar account to get your image to pull there. Please make sure you sign up to Gravatar using the same e-mail address you use to login to your WordPress account or the accounts will not link and your image will not pull.

Footer 2
The Footer 2 area is styled for the custom Brunch Pro Featured Posts widget. Please use the following settings to set up this widget just like the demo:
Please replace the instances of '#' with the url to your social media accounts to configure the Simple Social Icons widget.The Genesis eNews Extended widget is used to set up your newsletter opt-in.
This plugin is designed to be used with a newsletter service such as Mailchimp, Aweber, Mailpoet, or any of the other popular newsletter services.
You can Google "Genesis eNews Extended + whatever service you choose" and there are bound to be some tutorials and videos to guide you in getting that set up.
Here's the plugin info page where you can read about installation and get support: https://wordpress.org/plugins/genesis-enews-extended/

Footer 3
Footer 3 is styled for the Simple Social Icons plugin and the Genesis eNews Extended plugin. Please use the following settings to set up this widget area like the demo. Be sure to replace all of the data fields with your own information.

Footer 4
The footer 4 widget area can be used to add the "WP Instagram Widget". You'll need to install this plugin under your plugins page. Once installed, the widget will appear under the "Available Widgets" and you can configure it as needed.

